Sunday, October 25, 2015

Rhinebitches! or How I spent the weekend after Thanksgiving

Here it is, the post you've all been waiting for. The New York State Sheep and Wool Festival held annually in Rhinebeck, NY, known to knitters, crocheters, spinners and fibre lovers in general as “Rhinebeck”, took place last weekend, October 17 - 18, 2015. I had never been before and never actually thought I would ever go. But last year my daughter went with a group of her friends who asked her if maybe her mom would like to come the next year. Well, I never! Of course I said yes. Who wouldn’t? It meant missing a day of teaching, but I could always make those lessons up. Yarn festivals, on the other hand, only happen once a year.

I drove with my daughter and her friend Erin on Thursday as she, Erin, had signed up for a spinning class on Friday morning. We took her car and her GPS system, crossed into the U.S. of A. at Niagara Falls around 1:30 p.m., and promptly got lost. Sure, the GPS seemed to think it knew where it was going, but it wasn’t until we got off the highway to use the toilet in a tiny town (so tiny it didn’t show up on the map) called Elma and actually bought a map, that we realized how off course we were. Once on the I-90 headed east, we made much better time and arrived at our destination at 12:30 a.m., almost exactly 12 hours after we had left my daughter’s place. Not an auspicious start.

The converted coach house which served as our accommodations was lovely. There was a large room which the three of us girls shared and another room down the hall which was taken by our fourth knitter with her husband and toddler. The bed I shared with my daughter was extremely comfortable, Erin had no complaints about the pullout couch and we were surrounded by trees decked out in their glorious fall colours. It was pretty darn picturesque.

Beforehand, Joanna (the toddler’s mother) had designed a logo for us to put on a T-shirt. Luckily mine arrived in time and I model it for you in this photo. You’ll notice that there are no dots on the i’s and no point for the exclamation. I added rhinestones which I found in a dollar store.


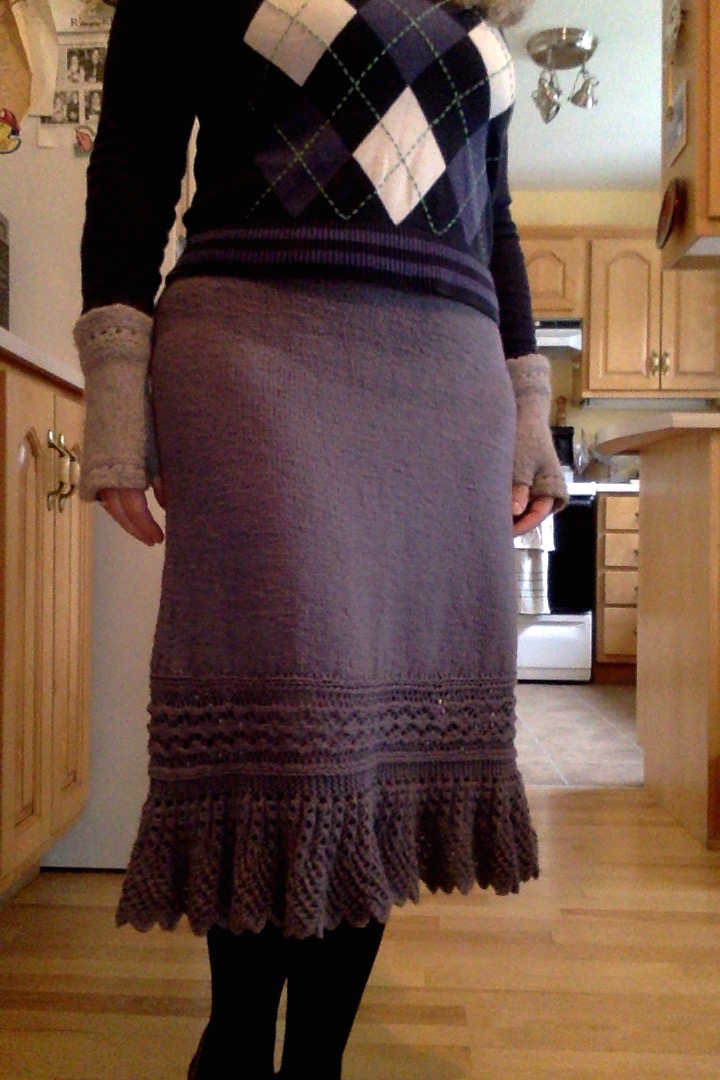
Here are my daughter and I in our matching garments.


Note that we have our knitting in our laps, and we’re both wearing knitted skirts and socks, although you can’t see hers in the photo. It certainly was a good weekend to view lovely handknits. Everyone was decked out in their finery.

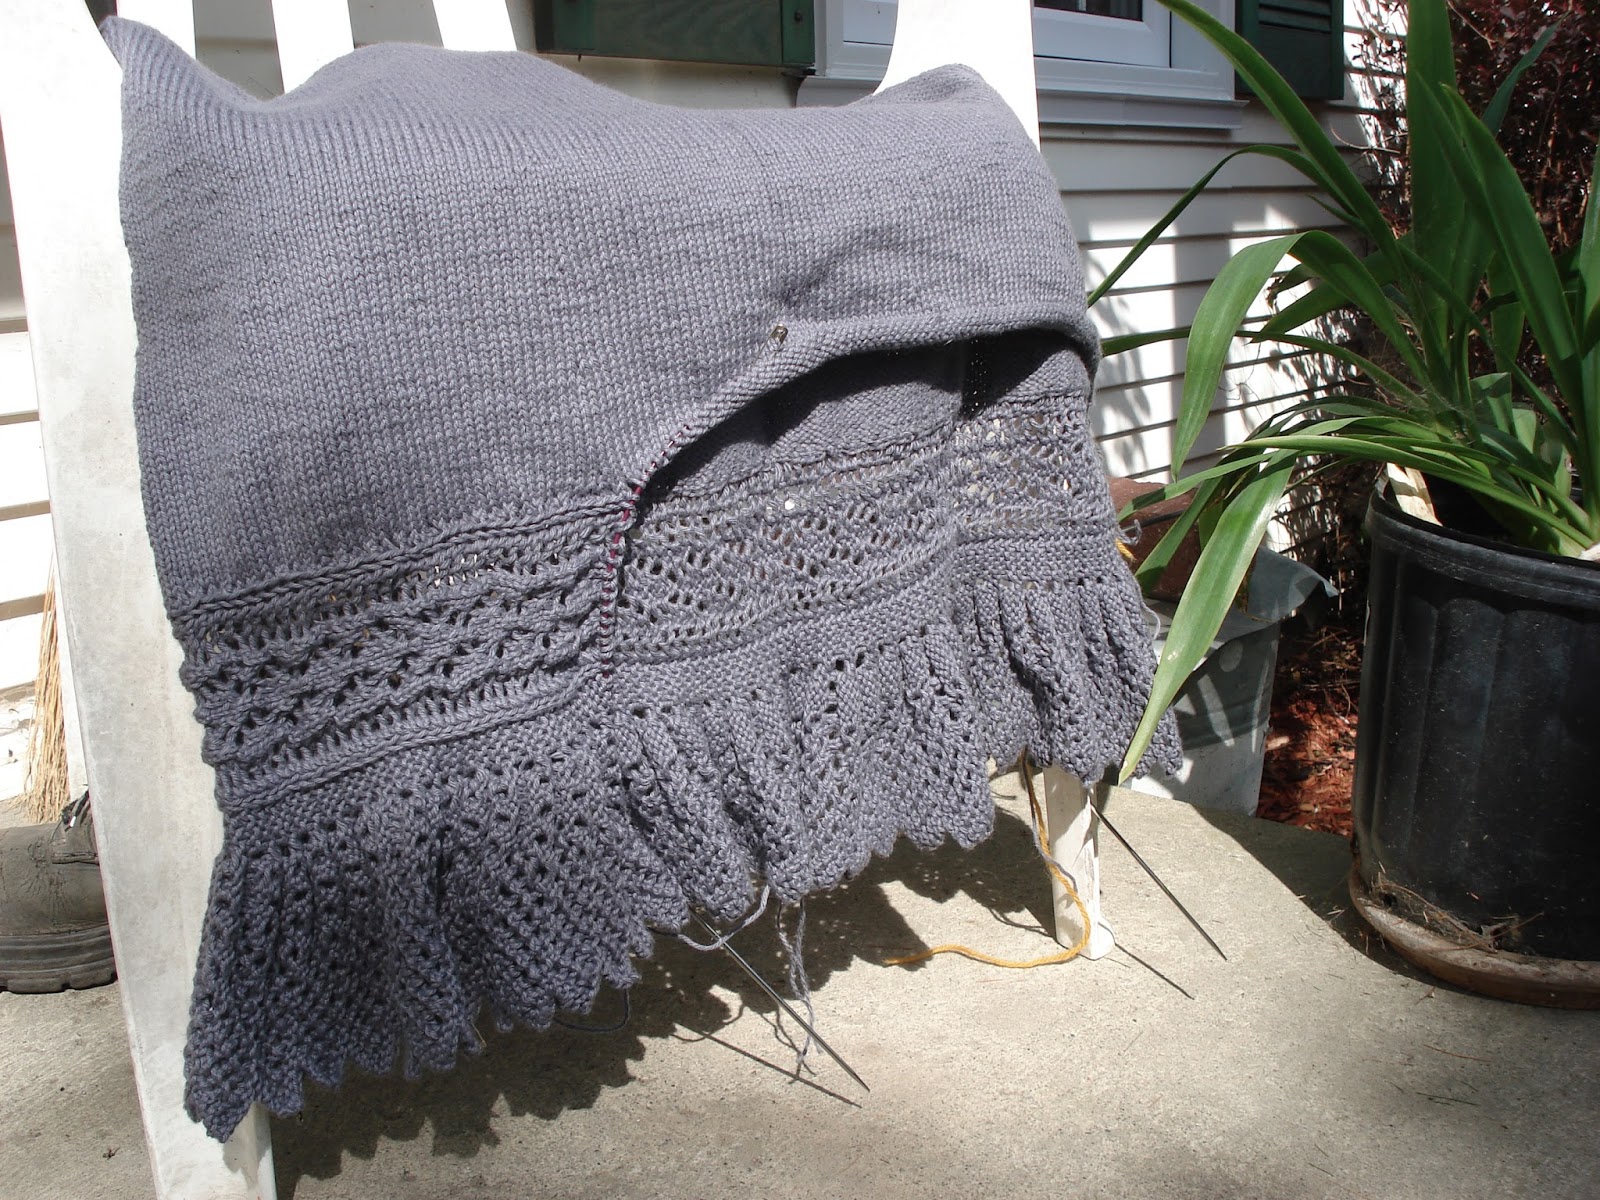
There were, of course, many, many yarn vendors on site. Many. So many, in fact, that it was quite overwhelming. Every fibre you can imagine was represented, from alpaca to yak. If there were such a thing as zebra yarn, it would have been there, too. Below is my haul.


Starting at the top is a box of Fiber Optic Yarns Paintbox Gradient Kasmir Yarn, 80% merino, 10% nylon, 10% cashmere. Directly underneath it are two skeins of Bittersweet Woolery Hero in two different colours because I plan to make myself another Biarritz Cloche that will be warmer than the one I already have in cotton. The Hero should prove to be perfect for the task, being 75% wool, 25% nylon.

In the middle is a single skein (Note: They’re all single skeins) of a brushed mohair and silk blend, the colour of which is not really done justice by that photo. Maybe this works better:


I picked it up and said, “This should be called ‘Mist rising at dawn over autumn field’,” and a woman standing next to me asked, “Are you a poet?” “Actually, I am,” I replied. But the assigned name for this yarn, Sea Oak, is almost as good as the one I came up with. There are only 28 grams of it, so it’s going to have to be for something special.

Next is a skein of 100% cashmere by Xanadu. It was so incredibly reasonable, only $35 US, that I simply could not leave without it. I later found out, by talking to a goat farmer, that cashmere is so expensive because a goat only produces about six ounces of it a year; so I felt I’d got a rather good bargain. At the bottom of the picture is laceweight tencel, a fibre I have only heretofore seen blended with others. There’s a lot there and it’s a gorgeous colourway, and I know that I’ll find a project for it somehow.

Off to the right is a skein from Skaska Designs of 55% silk, 45% angora in one-ply cobweb. I love angora, its rabbity softness and all, but every sweater I have ever had made from it has made me itch. I’m taking a chance here, I know, but this stuff is not fluffy and it looks absolutely perfect for making a Shetland-style wedding ring shawl. 

Tucked in between the Skaska and the other wools are three bundles of silk hankies. These are layers of unspun silk which can be pulled apart and stretched into yarn for knitting. I’m very excited about trying them out. The last two items are a fixed circular knitting needle (2.25 mm red Chiaigoo) and a silverplate spoon handle made into a shawl pin. I think I did rather well for myself.

I am not a spinner, but my friends are. If I were a spinner, I would have definitely sprung for some silk and yak roving that was braided into long ropes. The sheen off the fibres was enticing, as well as the softness. Joanna and Erin both got some. There was a whole section of one large building devoted to sheep fleece. Joanna and Erin went halvesies on a huge bag full of the stuff. My daughter spent a good half hour with an E-spinner, and then again with a spinning wheel. She also learned how to use the Charkha wheel her boyfriend had got her a few years ago which had remained a mystery until now.


No country fair is complete without livestock. Rhinebeck had lots and lots of livestock: sheep, goats, llamas, alpacas, paco vicuñas, rabbits and maybe something else, although I think that just about covers it. You could watch sheep getting sheared, pet baby goats, and stick your hand through cage wires to feel the softness of angora bunnies. But the best time of all was the “leaping llama” contest.

Imagine high jump for farm animals, if you will. The bar starts off quite low. Even this tiny goat was able to get over without knocking it off the hooks.


Then it got raised a bit, and it was easier for the tiny goat to walk under than step over.


Some animals simply refused to cooperate.


For the larger animals, like this alpaca, this level was a piece of cake.


By this time my knees were getting pretty sore from trying to take pictures through the fence, so I gave up. But I did get one great action shot before I called it quits.


When the bar was placed at the highest level, there were only three llamas left in the race. None of them actually made it over without knocking it off, but they gave the prize to the one who’d won last year because she came the closest to a successful leap. 

Here are a few of the leapers close up.


I also give you the fluffiest bunny I have ever seen in my life.


There was also a group of Peruvian musicians performing on traditional instruments. I imagine they must have been rather chilled, as it was snowing a little when we came out after watching the leapers. The drummer certainly doesn’t look very happy.


Our trip home was uneventful. I drove the first leg, Erin drove the second, and then I took over right at the end. She still had another half-hour behind the wheel after dropping my daughter and me off at her front door, exactly 60 hours after we left. 

Next year I will bring more money, warmer clothes and more comfortable shoes. 

Friday, October 9, 2015

Junonia Skirt: an adventure from start to finish.

I started this project May 11, 2015 with the intention of having it ready to wear to my niece’s wedding mid-August. Much rending of hair and unravelling were involved. This is basically the story of how I modified the pattern to suit my needs and knitting style. First, a picture of the Junonia Skirt as it appears in the pattern:


It’s a gorgeous skirt. I bought the entire Windswept collection by Kerin Dimeler-Laurence because of it and that beautiful lace ruffle at the bottom. Of course, I was going to do things differently.


The first problem I encountered was gauge. I am notorious for not testing gauge ahead of time. Like, seriously. If only I would knit a swatch to begin, I could save myself a lot of trouble later. But no, I just cast onto the specified needle size and forge ahead, having to rip back later and crawl on my knees to the frogging pond.

I actually used the recommended yarn: Knitpicks Cotlin. It’s 8-ply DK, 70% cotton - 30% linen, and is quite nice to knit with. The mill must have beaten it with rocks because it is much softer than either straight cotton or linen yarn and doesn’t hurt your fingers the way they do. The recommended needle size is 3.5 mm, and that’s what I used to begin, casting on 160 stitches for the smallest waist size. After the provisional crochet cast-on was pulled out and the raw edge picked up to make a casing, I measured it. It was enormous! So I checked my gauge (which I should have done first, n’est-ce pas?) and found that I was getting a much smaller number of stitches per inch than that specified in the pattern. Do I really knit that loosely?

Frogging and lamentations ensued. I then knit a swatch on 2.75 mm needles. It was very close to gauge, maybe even a bit tight, which is fine because I loosen up as I go and things tend to stretch with wear. I once more provisionally cast on 160 stitches and knit 5 rows in stockinette before joining in the round. This left a hole for me to thread the elastic through after I picked up the live stitches for the casing, as opposed to leaving 12 live stitches on waste yarn to be sewn in later. A much better solution to the casing problem and also kept me from accidentally creating a möbius strip instead of a cylinder.


Thence began round upon round of mindless knitting with the occasional increases. This project kept getting put aside so I could pursue other things, such as the three test knit shawls in a prior post. It was perfect for bringing on long trips in the car or to knitting group where lively conversation meant I didn’t have to pay attention to a pattern, but it grew slowly. It wasn’t until I was on vacation in Washington, D.C. mid-July that I finally finished the stockinette. There would have been rejoicing except that I was faced with yet another conundrum.

You see, I didn't want to knit a separate edging and then sew it on. I wanted to make an applied edging as I had done with the Pink Sundae Camisole. But whereas that edging matched up perfectly stitch for stitch with the camisole bodice, the total number of stitches in this edging are fewer than those in the skirt. But that wasn’t my first problem. Oh no. My first problem was figuring out the edging itself.

Without insulting KnitPicks too much (and they were extremely helpful when I emailed them with this problem), the edging chart is written inside out. Yes, folks, the side facing you, the RS, is really the inside of the skirt and the WS of the chart is what will eventually be facing outward. Nowhere in the pattern does it say this. When I looked at FOs on Ravelry, everyone seemed to have got it right, but then, they were knitting the edging separately and sewing it on, going by look. Nary a one of them had applied it as I hoped to.

I discovered the inside-out nature of the chart after I had tried applying it to the skirt on the RS and realized after a pattern repeat or two that it looked very, very wrong. (There was also a provisional cast-on involved, as you will see.) So then I ripped it out and tried again on the WS of the skirt, applying the edging stitch for stitch. This is what I got.


Apart from the fact that I had misread the pattern (no surprise there, although no one who didn’t know how it was supposed to look would have noticed), I didn’t like the way it looked at the point of application. I mean, the top of the horizontal band should match the bottom, where the line of slipped stitches lies. It was then that I went back to the pattern itself and realized that the instructions for the edging produced a smaller number of stitches than the skirt had. The exact ratio was 280/192. If I continued as I was doing, my edging would be way too wide. Frogging and lamentations again, folks.

This was the hard part: figuring out the ratio in real knitting terms. Each repeat of the edging chart comprises four slipped edge stitches at the applied edge (and two of those lace points at the bottom in the picture), or 8 rows of actual work, and I was supposed to do that 48 times. I couldn’t handle those numbers. My mind boggled and I became mathematically deficient. So I did what any artsy, non-technical, university grad does: I found a common denominator and worked from that. In this case, I divided it by four. I could have done eight, which would have been even easier, but I could handle 70/48 better than 280/192. The problem with using calculators is that they give you fractions in decimals, and I needed to do good old-fashioned long division and find out what my remainder was. I determined, after giving up on the calculator and working with pencil and paper, that I needed to apply one repeat of the edging to six skirt stitches ten times and to five stitches two times. Or: 10x6 + 2x5 = 70. In actual knitting terms, it translated into this, each stitch referring to what happens when I encounter my live skirt stitches from the WS of the chart (which is actually the RS of the skirt): *(k2tog, k3tog, k2tog, k3tog) 5 times, (k2tog twice, k3tog, k2tog)* for each 35 live skirt stitches.

Having figured out the math, I now had to deal with that ugly border at the top. I picked up another loop of my provisional cast-on and knit an extra stitch on the edging which became the joining point. Instead of knitting two or three stitches together at the join, I purled them, then knit it on the way back and slipped the first pattern stitch as specified. The result worked better than I imagined.


Disaster struck when I had completed one-fourth of the edging: I had two balls of yarn left and I calculated that I would need a third to finish. I remember reading on other Junonia project pages that the pattern specified too few balls and there had been some shortage problems. I shot off an email to KnitPicks asking if there was any Cotlin left in my dye lot. I figured if there was, all was well and good. If not, either it would match, or I could dunk the finished garment in a dye bath. I got my reply quickly enough: Sadly, there was no stock in that dye lot, but they would happily waive shipping costs so I could complete my garment.

The new ball of yarn arrived very quickly and is a pretty close match. Here it beside the stuff already in progress.


Full of good cheer, I got back to work. With what you see above remaining, I had this much ruffle left to knit:


The safety pin on the cable marks the middle of the skirt back and my next milestone. I knew in my heart that I was not going to have enough yarn, even with the new ball. I would be so devastated if I used it up and still had several live stitches left to bind off. I had done so much and it was looking so good and the wedding was less than two weeks away. What to do?

After much thought, I came to a cataclysmic decision: I would rip back to just after the previous increase in the skirt body (from 280 to 272 stitches), which should recoup several grams of yarn and decrease the amount necessary for the ruffle (45 repeats as opposed to 48). It meant doing more math, but I could do it. I just mourned the loss of all that time knitting the ruffle to the point it was. But even if I ordered yet another ball of yarn, there was no way it would be ready to wear for the wedding.

With the moral support of my knitting group, I frogged all that beautiful knitting, winding up the unravelled yarn into balls. But my heart was no longer in it. I put it away, wore something else to the wedding, and let the skirt hibernate while I worked on other projects. Finally, on September 29, I brought it to knitting group again. With the help of one of my experienced friends, I got it started with a provisional cast-on and knit one pattern. When I brought it home, I ripped that out and started again with a knitted cast-on in the project yarn. I also had to figure out anew how many repeats of the edging pattern I would do and how to distribute them. I had left it so long that I’d completely forgotten the pattern and had to decipher the chart all over again which, as you will recall, is inside-out. But once I got a few repeats done, it all came back to me and I felt I was making progress.

On October 4 I got halfway through the ruffle. The new deadline was to have it ready to wear for Thanksgiving dinner (that’s Canadian Thanksgiving), which was one week away. Then I would wear it to Rhinebeck.


October 8 it was finally done. I weighed the finished skirt and it clocked in at 414 gms. I was absolutely certain I had purchased nine balls of CotLin originally. But it looks like I didn’t because the numbers added up to eight and change, the latter being that emergency ball I ordered from KnitPicks. So, either I hadn’t bought what I thought I’d bought, or somewhere along the way (and this does happen) I lost/misplaced a ball of yarn. Nonetheless, the new yarn matched the old perfectly and I could not see the join.

Speaking of joins, I tried grafting the ends of the edging together with terrible results, so pulled that out and whipstitched the live stitches to the loops of the knitted CO. It still looks pretty bad. At this point of the game, I’m not going to get all stressed about it. As my father would have said, “Nobody will say anything.” The pattern also calls for a lining which I refuse to make. Instead I’ll wear an old-fashioned slip!

And it’s done! What I learned: Read the directions first. Consider all possibilities first. Buy more yarn!